Pages

Sunday, October 11, 2020

Monster Teeth

Halloween will be quite different this year due to COVID19. We brought out  all our decorations and have put them out in our house, but we still felt a void around Trick-Or-Treating. I've read articles online of suggestions on how to safely give out candy during quarantine, but I think it still poses some risk. There must be something else we could do. Here's our solution; a Halloween Photo Op. We put up a monster in front of our house that everyone in the neighborhood can enjoy and have their photo taken with, if they choose. This guy is up for the next few weeks, so kids have all month to enjoy, not just on Halloween. 

We had most of the items on hand in our stash of Halloween decorations, but I needed a set of teeth to really add a finishing touch. These were easy to make and addictive. I kept making more and more monster teeth for around the house. Hope you will try to make a set for your home. 

Materials needed: ribbon (I used black, but red might look like gums), foam sheets (I used white, but yellow or green could be used too), a stapler and scissors

First decide how big your want your teeth to be and cut them out of foam sheets.


Then cut an amount of ribbon long enough to attach your teeth, but with a little extra on each end so you can hang it up. 

Staple your teeth to the ribbon and your teeth are complete.


Here is our monster photo op complete with the new set of teeth


And a few others I made to decorate around the house


Sunday, February 12, 2017

Easy Handmade Valentines

It's easy to send handmade Valentines. My son and I made a bunch of these this year for his class.


Using a stiff paper, draw a simple heart, then paint the heart. After the paint is dry, using a dry paintbrush in a contrasting color, splatter the paint on the card by flicking the bristles of the brush. It creates a very finished look.

These were fun to make. My son enjoyed picking different color combinations.


Monday, November 30, 2015

Christmas Tree Trimmings Wreath

I started this blog with a very similar post on how to use left over Christmas Tree trimmings. Two years later I'm still trying to find new, creative ways to use them. This year I took the discarded Christmas tree branches and made my own wreath. Here's how I did it.


First I took an old wire clothes hanger and bent it into a circle with a pair of pliers, securing the ends.


Then I began placing the branches on the wire circle and tying them to the clothes hanger with green garden wire. I layered one in the front, one in the back, and staggered the branches.


I continued to add branches until I was satisfied with my wreath. I added a bow and hung with the attached hanger.


I am so thrilled with this wreath. It was so easy to make, but it looks like I bought it.

Tuesday, October 27, 2015

Eek a Mouse!!

Help, I have mice!! These guys are really cute and easy to make. I found mice silhouettes I liked online, sized it appropriately and cut them out in black poster board. I attached them to the moulding with double-sided tape. We have ours climbing up a staircase, but they would be fun running over a kitchen back splash too.


My son loves these. He even added his stuffed kitty at the top of the stairs "watching" them.


Friday, October 23, 2015

LEGO Halloween Costume

All little boys are crazy for  LEGOS. My son, is no exception. So, a LEGO brick was the obvious choice for this years Halloween costume.

To make this costume I used white cardboard display boards from Staples, a glue gun, x-acto knife, masking tape, ribbon, and yellow outdoor spray paint. I measured my son to decide length and width of the costume, then got to work.

The costume has 3 main pieces; 2 front/side pieces and a top. I basically built a rectangular box, but left one end open. I utilized the hinges of the display board so I didn't have to make as many cuts.


On the top piece, I cut out an oval shape for my sons head to fit through. Then I used a ramekin to draw circles on the side pieces for the arm holes, and cut them out with an x-acto knife.  For the LEGO studs (the bumps that make LEGOs stick together) I cut out 6 circles. I measured the circumference of the circles with a tailors tape measure and then cut out 6 strips of cardboard, two inches wide. I also added two tabs on one side of each strip. This is to hold the LEGO stud to the LEGO brick.


Now I assembled the LEGO studs. I bent each cardboard strip so that it forms a circle. Sometimes rolling it around a broomstick is helpful. Then I used masking tape to hold it together. I hot glued the flat end of the cardboard strip to the circle edge with the tabs facing out. I did this step for each stud.


With all the studs assembled, I could attach them to the front side of the LEGO brick. I positioned the studs where I wanted them to lay and marked these spots. Then with an x-acto knife I cut out slits, just a little bigger than the actual tabs. I carefully pushed the tabs through the slits into the cardboard. I folded the tabs down and hot glued them in place. I did this step with all the studs.


I assembled the 2 front/side pieces together by taping them first with masking tape, and then hot glued them. I also made small braces on the inside of the corners for added stability and to keep the costume rigid.

Before I attached the top piece, I put the costume on my son to determine how low, or how high it needed to sit. Then took 2 pieces of ribbon to go from front to back of the costume like suspenders. I cut 4 pieces out of scrap cardboard and hot glued them down over the ribbon to prevent the ribbon from slipping.


I was now ready to paint my LEGO brick. I choose an outdoor waterproof spray paint in yellow. I sprayed several coats for best coverage. Now my LEGO costume is complete.


Here is the LEGO costume in action. Happy Halloween everyone!!!


Monday, October 19, 2015

Spooky Owl Silhouette

Halloween is almost here. This owl is an easy do-it-yourself decoration. I found an owl silhouette I liked online, enlarged it to a realistic size, then cut it out in black poster board. I also cut out eyes and replaced them with neon orange construction paper to make them appear to "glow". Then I just used double sided to stick it to the wall.


I have a two large birch trees stenciled in my living room that is the perfect spot to perch my owl, but you could put one anywhere in your home, like over a door or window frame. No matter where you put your owl, you will always feel it watching over you.


Tuesday, July 14, 2015

Summer Art for Your Front Door

I love brightening my front door with art I've made. This piece I created to match a pink flamingo outdoor flag.  The art was easy to make. I cut out a pink flamingo silhouette and lagoon from paper I marbled myself. Then I painted a canvas navy blue.  I adhered the paper cuttings to the canvas with mod podge for outdoor use. Then, I attached a ribbon on the back with a staple gun for the hanger. I love how it gives my front door such a unique look.


Wednesday, June 24, 2015

Keep Bird Feeders Tidy with Patio Stone

I love having a bird feeder. Ours is placed just outside the living room. The entire family enjoys watching the wildlife it attracts. Acrobatic squirrels entertain our cat and dog for hours. However, the downside of having a bird feeder is the mess it makes all over the ground underneath it. It seems I'm constantly pulling up weeds that sprout. To combat this issue, I decided to use patio stone underneath the feeder. The patio stone helps to keep the seeds from sprouting and gives it a decorative look.

I shopped around at my local Lowe's for patio stone and chose one that would suit the purpose, and add character to my bird feeder. The area under my feeder is small, so I only needed 4 pieces. I paid less than $5 for the stones.

We cleaned out the area under the feeder, measured where the stone would be placed, and began to dig. We dug a little bit deeper then the depth of the stones and a little wider. Then we positioned the shepherds hook that I hang my feeder on in the hole and put down a layer of sand. I then placed my patio block on top. We filled in the cracks around the stone pieces with more sand and a little bit of pea gravel.

Thursday, May 28, 2015

Scarf Wall Decor

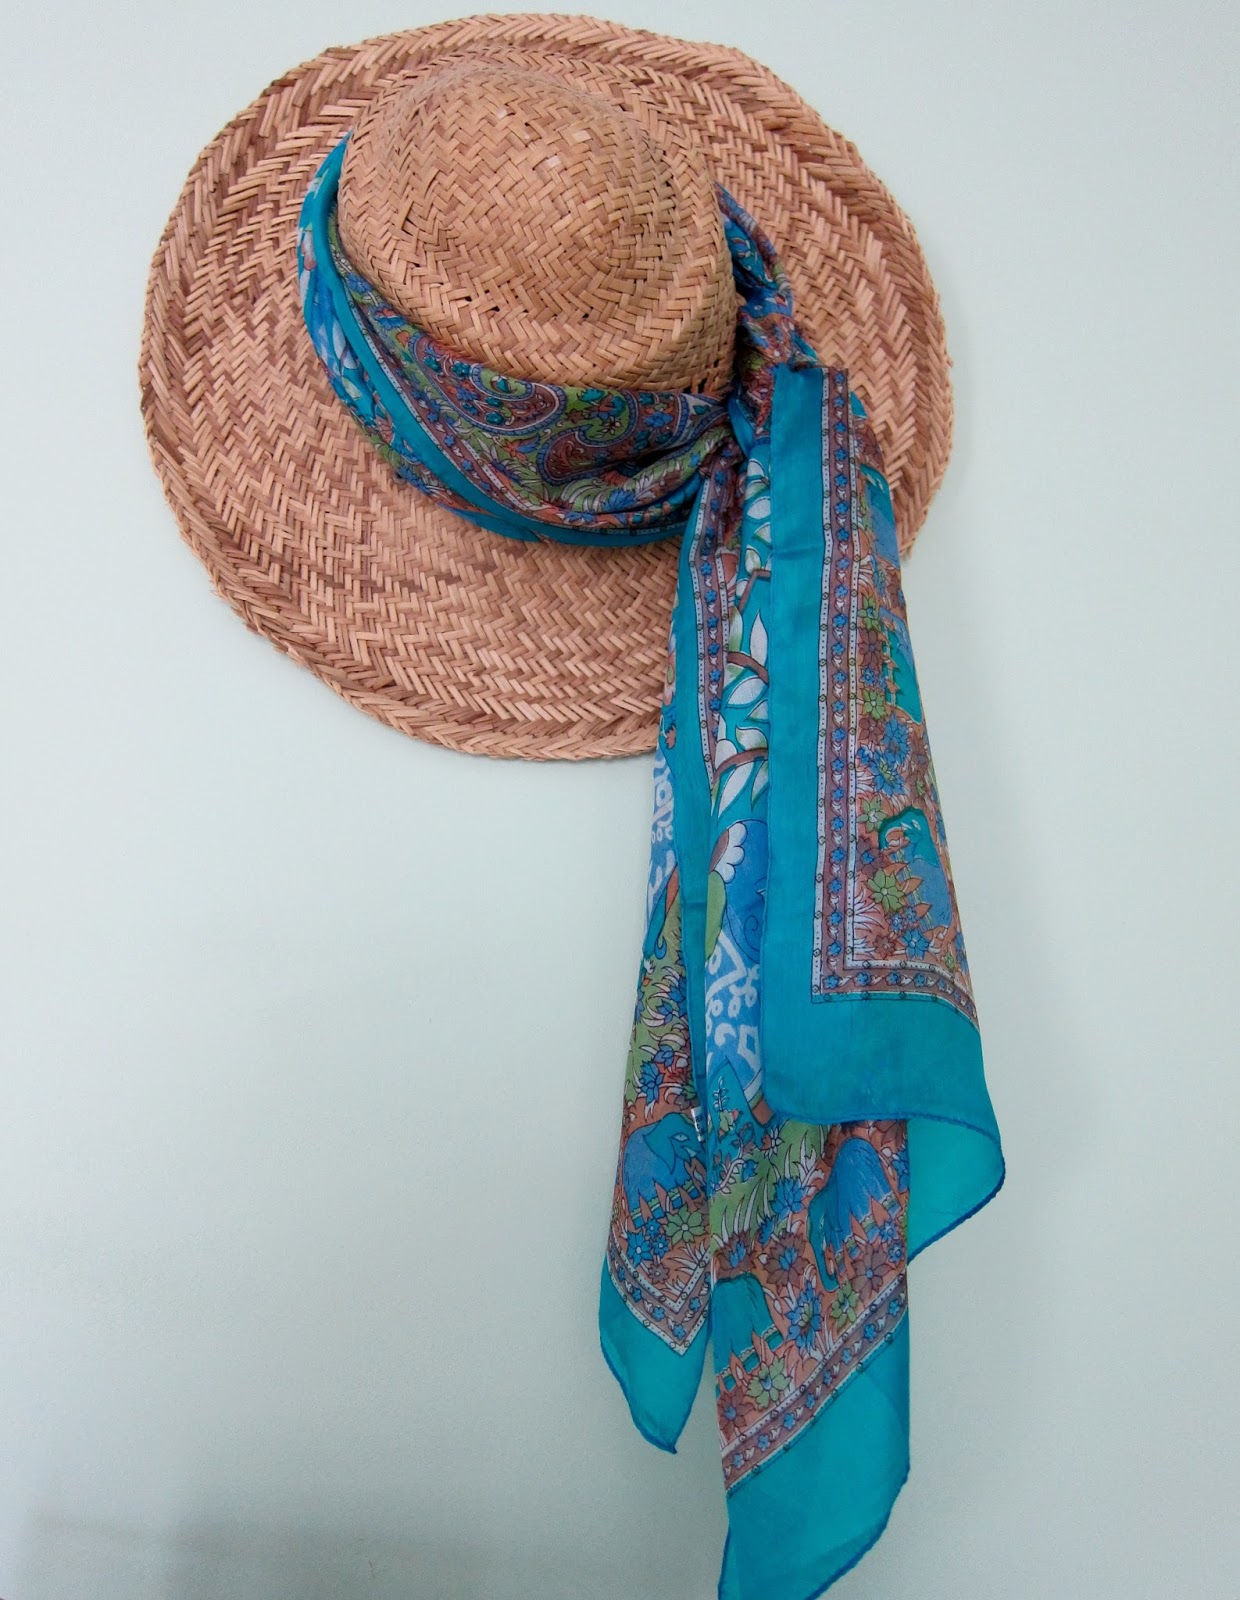
My husband travels frequently for work and he recently returned from India. He brought me this beautiful silk scarf. But, I don't wear scarves and decided to display it in my home instead. So, I tied it around a simple straw hat, and hung it on my wall. Now it adds a pop of color to my bedroom that I enjoy every day. So if you're looking for wall decor that is not only unique, but bright and cheerful too, give this a try.

Tuesday, April 14, 2015

Upcycled Patchwork Jeans #2

Instead of throwing away your favorite pair of jeans when you get a hole in the knee, try patching them. A patch is not only functional, but can add character too.


Saturday, March 14, 2015

St. Patty's Day Pie

In the spirit of St. Patrick's Day, here's an easy dessert to whip up for your family. My 3 year old had fun helping. We even made a lighter version with low fat milk and lite cool whip.

Cool, Creamy St. Patty's Pie
1 1/2 cups cold milk
1 pkg Jell-o pistachio pudding mix
2 cups cool whip, thawed and divided
6 double stuff oreo cookies, chopped
1 oreo pie crust
1 square semi-sweet baking chocolate

Pour milk into a large bowl and add the dry pudding mix. Beat with a wisk for 2 minutes. Gently stir in 1 1/2 cups cool whip and chopped oreos then spoon into crust. Spread the remaining 1/2 cup cool whip on top. Melt chocolate as directed and drizzle over pie. Refrigerate 2 hours.


Wednesday, February 18, 2015

Ice bubbles

Need something fun to do when it's cold outside? Try freezing bubbles. The temperature needs to be at least 16 degrees or colder for this to work. Blow a bubble, then try and catch it on the wand. Once it has frozen, place it gently on a hard surface. They will pop, but since they are frozen will not disappear. Instead they become beautiful, delicate structures that resemble glass.


Wednesday, January 21, 2015

Hopeful for snow

With temperatures in the mid 60's all week, it doesn't look promising for any white stuff. At least my latest chalk board art I did puts me in the mood.


Sunday, December 14, 2014

Pepperint Swirl Cookies

I bake several kinds of Christmas cookies each year to share with friends and family. This is a "twist" I made on one of our favorites. After baking the cookies you top each one with a peppermint Hershey kiss. Instead of refrigerating them to keep their "kiss" shape, I allowed them to melt and swirled them with a toothpick. I think they are much prettier this way and your children will have fun helping.


Monday, December 8, 2014

Christmas Decor for Your Front Door

I tried something a little different this year and decorated my front door with a piece of seasonal art instead of a traditional wreath. The art was easy to make. I painted a canvas red and affixed the Christmas tree to the canvas with mod podge for outdoor use. Then, I attached a ribbon on the back with a staple gun for the hanger. The Christmas tree was cut out of paper that I marbled, but you could use just about anything; sheet music from your favorite Christmas song or sparkly gift wrapping paper. I love how it gave my front door such a unique look.

Friday, November 14, 2014

Beautiful Birch Trees

Do you have a wall in your home that begs for something unique? Try a wall stencil. This is what I decided to do in our living room. Wall stencils are easy, fun, and since its your own creation, something you'll be proud of for years.


Friday, October 31, 2014

Disney "Cars" Family Halloween

The "Car" family took a drive down town for a little trick or treating this evening. The weather was perfect. We had a great time. 

"Cars" Family

Wednesday, October 29, 2014

Jack-O-Lanterns

We always enjoy carving pumpkins together as a family. Check out this years creations.


Friday, October 24, 2014

Easy breezy bats

Looking for that last minute Halloween decoration? These bats are so easy. I cut them out of construction paper, strung them with black string and hung them on my mantle. You could also hang them from a door frame. They swirl and spin with the slightest breeze.