The general design for the costumes is a car made out of cardboard, without a roof, and held up with suspenders. I used Elmers tri-fold display boards I bought from Staples. You could use old card board boxes, but I didn't want to fuss with creases that I could never get out, or painting over dirt and grime from shipping. Each costume varied in size, but I think for all three Halloween costumes I ended up buying 7 backer boards. The ones I choose had a traditional brown cardboard side, but the other side was white. The white side was perfect for the outside of the costume because it took paint well. I used 3 different spray paints, but outdoor rated spray paint worked the best. To hold these things together, I used masking tape and hot glue. After they were assembled, I spray painted them. That's a brief overview, there was more to it than that, so let me explain what I did for each one.
 |
| Disney Cars Halloween Costumes |
Lighting McQueen Halloween Costume:
The Lighting McQueen car is 5 basic pieces: 2 sides, a hood, back window/trunk piece, and back bumper/spoiler piece. I first measured my son and decided the costume would be 32" long x 10" wide. Then I found the best profile image of Lighting McQueen online. I blew it up to the size I wanted and printed it out. It was way too big for a standard size page, so I printed it out in segments and pieced it together, then cut out the shape.

I traced the shape onto the cardboard with the white side out. Then I cut out the shapes out of the cardboard with an x-acto knife.

Now I began to make the inside pieces. I measured the car shape from the bumper to the top of the windshield. It ended up being about 22". I cut a piece of cardboard 22" x 10" (the original width of the costume). I did this step for the back window/trunk piece and the back bumper/spoiler piece too. After cutting the cardboard pieces, I started bending them so they would easily match up to the car sides. Rolling them around a broomstick helped. Then I started to assemble the car. I used masking tape to hold the pieces stable, then went back with hot glue and glued all the inside seams.


For extra stability, I made simple joists; one under the hood and the other under the trunk. I cut an old box a little longer than the width of the car and folded it into three 3" sides. I cut 3 tabs at each end to secure them to the inside of the car, and glued them in.


 |
| Ready for the paint shop!! |
I spray painted the car metallic red. Then used white acrylic craft paint to make the windows, windshield and mouth. Then used yellow paint for the lightning strike on the side. I cut circles out of black foam sheets to make tires and "eyes" and hot glued them on. Lastly, I used a black paint pen to paint detail around the lightning strike. I attached child suspenders to the windshield and the back window so my son could wear it.


Sally Halloween Costume:
The Sally car is very similar to Lighting McQueen. In fact, the Sally costume was actually easier since it has less to assemble; it has 4 pieces and the Lighting McQueen costume has 5. I used the same template for Sally as I did for Lightning McQueen, only instead of a spoiler in the back, I rounded the tail off like a Porsche. I made the costume a little bigger as well to fit me. The length is 33" and width 15". I traced the shape onto the cardboard with the white side out. Then, I cut the shapes out of the cardboard.


I also made simple joists for the front and back to stabilize it; one is under the hood and the other is under the trunk. Then I continued assembling the car by attaching the second side. I spray painted the car a baby blue color I found at Lowes. Then used white acrylic craft paint to make the windows, windshield and mouth. I used black foam sheets to make tires and "eyes". Lastly, I used a black paint pen to paint long eyelashes on Sally's eyes. Then I used blue suspenders to hold the costume up.

Tow Mater Halloween Costume:
This costume is very different from the other two. Instead of trying to create a streamline look of a sports car with cardboard, I tried to make the Tow-Mater Halloween costume as boxy-looking as I could. This car has 17 pieces. I first measured my husband and decided that his tow truck would be 48" long x 18" wide. Then I drew the profile shape onto newsprint and cut it out.

The costume was way too big for a standard cardboard backer board, so I had to make it into 2 sections; a truck cab and a truck bed. I traced the shape onto the cardboard with the white side out. Then I cut the shapes out of the cardboard.

Now I began making the inside sections. For this step, I basically just built a box. I cut one piece for the grill, another for the hood/windshield, and one for the back window. Standing the pieces in place prior to attaching them together helped to visualize the final costume.
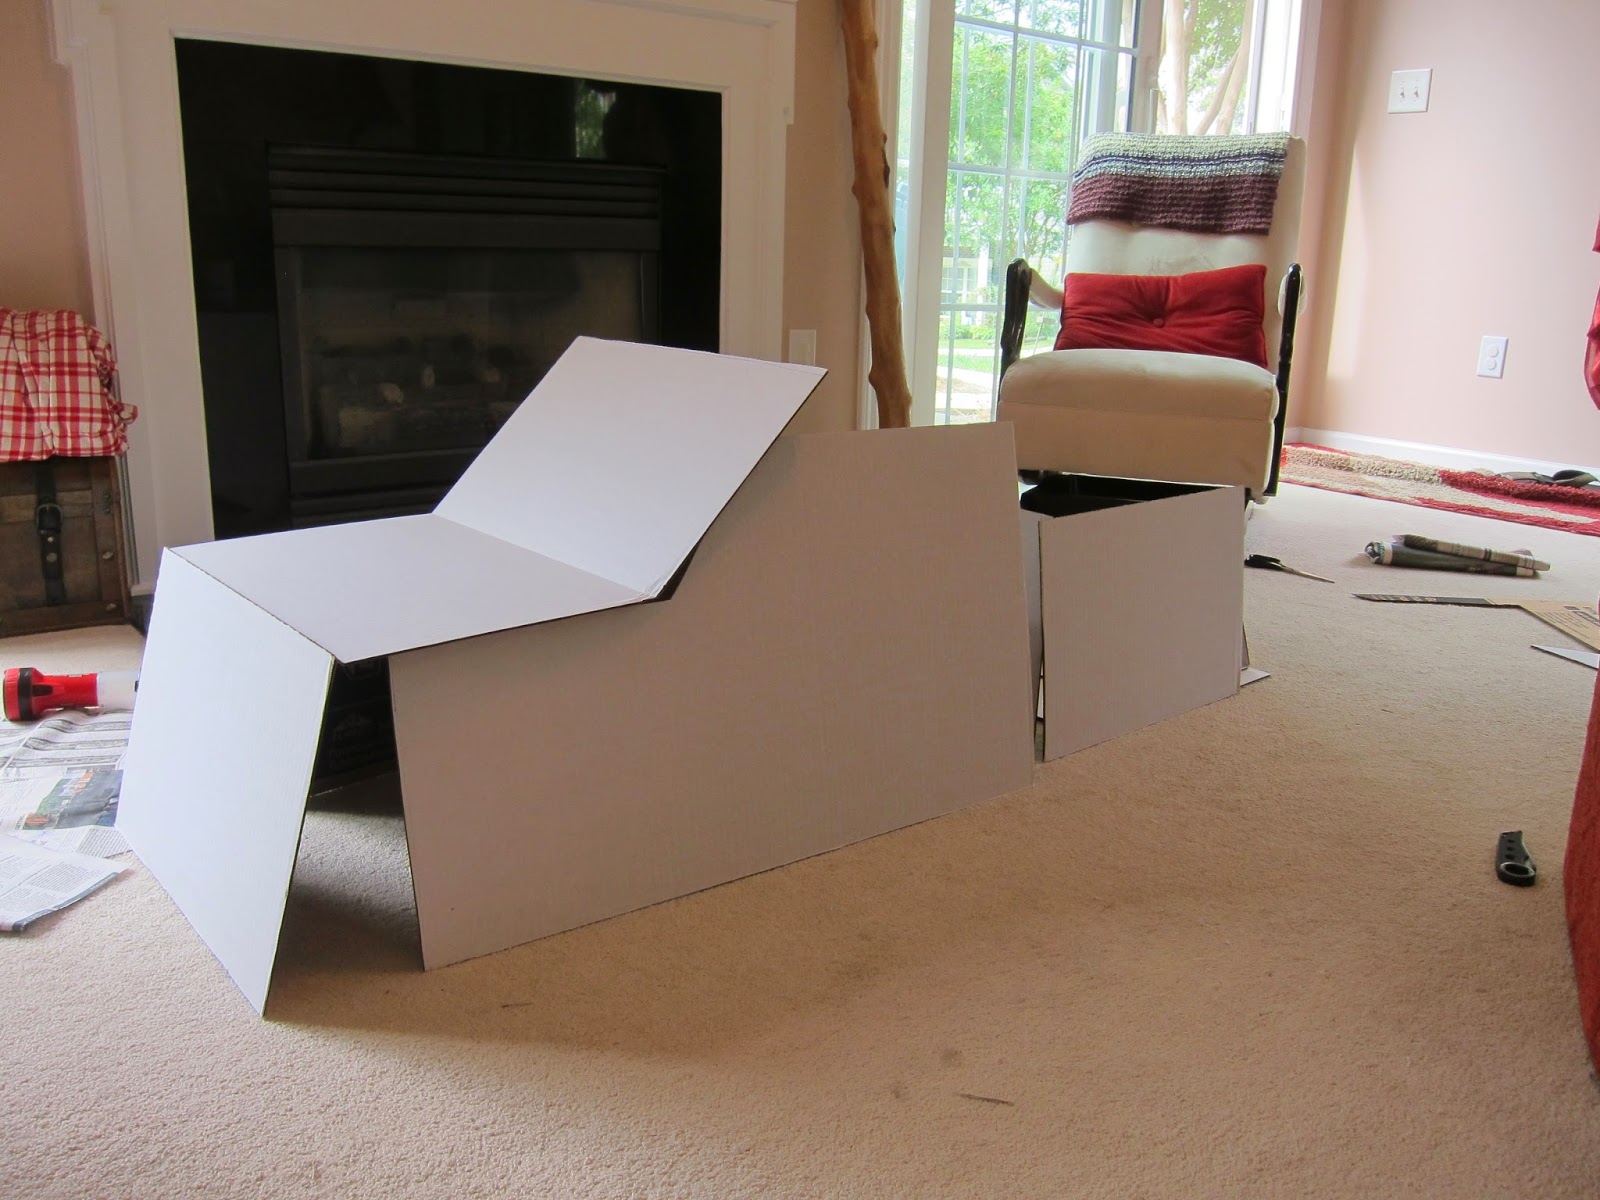
If you notice on Tow-Mater, his hood is missing, so I made the hood piece sit lower than the sides. I have plans for a fan belt and can lights, but we're not quite there yet. Then, I attached the grill, hood/windshield and back window. I taped them it to hold them stable, then hot glued the seams.
We wanted the truck bed to have a wench in it, so we needed the base to be very sturdy. We doubled up on the cardboard for the truck bed. One piece had a crease in it already, so we used that one as a working floppy tailgate. Before I could put those pieces together, I put the wench in between them. I drew the shape of a wench, and traced the shape onto cardboard and cut them out. I cut two pieces and hot glued them together, but only at the top. I adjusted the bottom of the wench in the truck bed so they form a triangle shape. I made two slits in the cardboard truck bed where I wanted it to go and slid it into the slots. I folded them over once they were in place and hot glued them down.


For extra stability, I made simple joists for the front and back. I put one under the hood and the other in the truck bed. The one in the truck bed will show, but we just used this as a holder for the tow rope. I connected the cab and the truck bed with a long strip of cardboard on the inside of the two pieces, taped it down and hot glued it secure.

Now that the body is complete I began to construct a few detail pieces. For the fan belt, I cut an 8" circle out of cardboard and another strip of cardboard to go around it 26" long by 1 1/2" high. However, I made this strip have 2 wider sections, as these will be tabs that attach it to the truck. I rolled the strip to make it flexible, then taped it to the circle piece and hot glued it. Then I made 2 slits in the truck hood to match the tabs of the fan belt, slid the tabs through, bended them over and hot glued them secure.


For the head lights, I used two old oatmeal canisters and hot glued them down. One canister I left open to place a small flashlight in that stays in place with the lid on.


I painted it with a brown spray paint I bought from Lowes. Then used white acrylic craft paint to make the windows and windshield. I cut two pieces of white cardboard for the "buck" teeth, hot glued it to the grill, and painted the rest of the mouth with white paint.

I used black foam sheets to make tires and "eyes". For the tow rope, I drew the shape of a hook, cut it out of cardboard, and covered it with silver HVAC tape. I strung rope from the hook, to the wench, and around the stability joist in the truck bed. The hook is strategically placed to that it holds the tailgate up. Then I used brown suspenders to hold the costume up.


These turned out great. We can't wait to wear them. I'll post pictures of us in the coming weeks, so keep checking back.
No comments:
Post a Comment